Microsoft has recently launched the development tool support for Windows Cloud Computing - Windows Azure.
Windows Azure Tools for Microsoft Visual Studio; extend Visual Studio to enable the creation, building, debugging, running and packaging of scalable services on Windows Azure.
Windows Azure Tools for Microsoft Visual Studio includes:
*C# and VB Project templates for building Cloud Services
*Integration with the Development Fabric and Development Storage services
*Debugging Cloud Service Roles running in the Development Fabric
*Building and packaging of Cloud Service Packages
*Browsing to the Azure Services Developer Portal
*Role configuration
*SSL Certificate selection
Download here:
Windows Azure Tools for Microsoft Visual Studio
Monday, November 17, 2008
Sunday, November 02, 2008
Resolution - Silverlight Initialize Error 2104
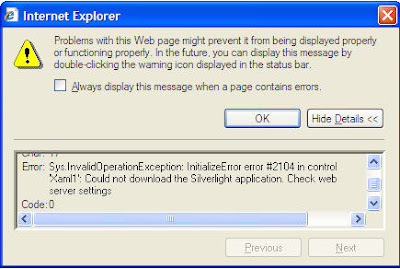
If you are working with Sliverlight application (VS2008 and Silverlight on WindowsXP) and getting the error# 2104 as shown in the figure below, then here are some of the trick which will work for you to resolve the issue:

Before trying any major changes in IIS(inetmgr), go to the solution explorer and open ClientBin folder, in which you will see a file created having name of your application and suffixed with a .xap extension, eg- SilverlightApplication.xap.
Now go to your aspx page which is calling the Page.xaml, in most of the cases if unchanged it will be SilverlightAppliacationTestPage.aspx, open this page (Source view) and you will find that source element is set to:
ClientBin/SilverlightApplication.page
If you observe here the file referred is filename.page which is a default setting, whereas the ClientBin folder have filename.xap, so change the extension of file for source element to .xap
It may help you to get rid of the error. If not...
Lets try some IIS setting changes:
1. Content Expiration Setting
By defalut its not enabled, so enable this:
Step-1: Right-click your Web Site, select Properties from the context menu.
Step-2:Go to HTTP Headers tab and click "Enable Content Expiration".
Step-3:Set the content to expire after 1 minute.
2. Let IIS know about MIME Types and File Extensions
To enable a Silverlight application under your IIS, you need to register some MIME types and file extensions so that the browser on the client's system can load the correct handler.
Step-1: Right-click your Web Site, select Properties from the context menu.
Step-2:Go to HTTP Headers tab and click on "File Types" under Mime Map section.
You need to add the following types:
------------------------------------------
Extension ----- MIME Type
------------------------------------------
.xap ----------- application/octet-stream
.xaml ---------- application/xaml+xml
------------------------------------------
3. Change Execute permissions to Scripts Only.
Step-1: Right-click your Web Site and select Properties from the context menu.
Step-2:Select the Directory tab and change "Execute Permissions" to Script only.
Once these settings are done, retry running your app, it will work for you.
Subscribe to:
Comments (Atom)


